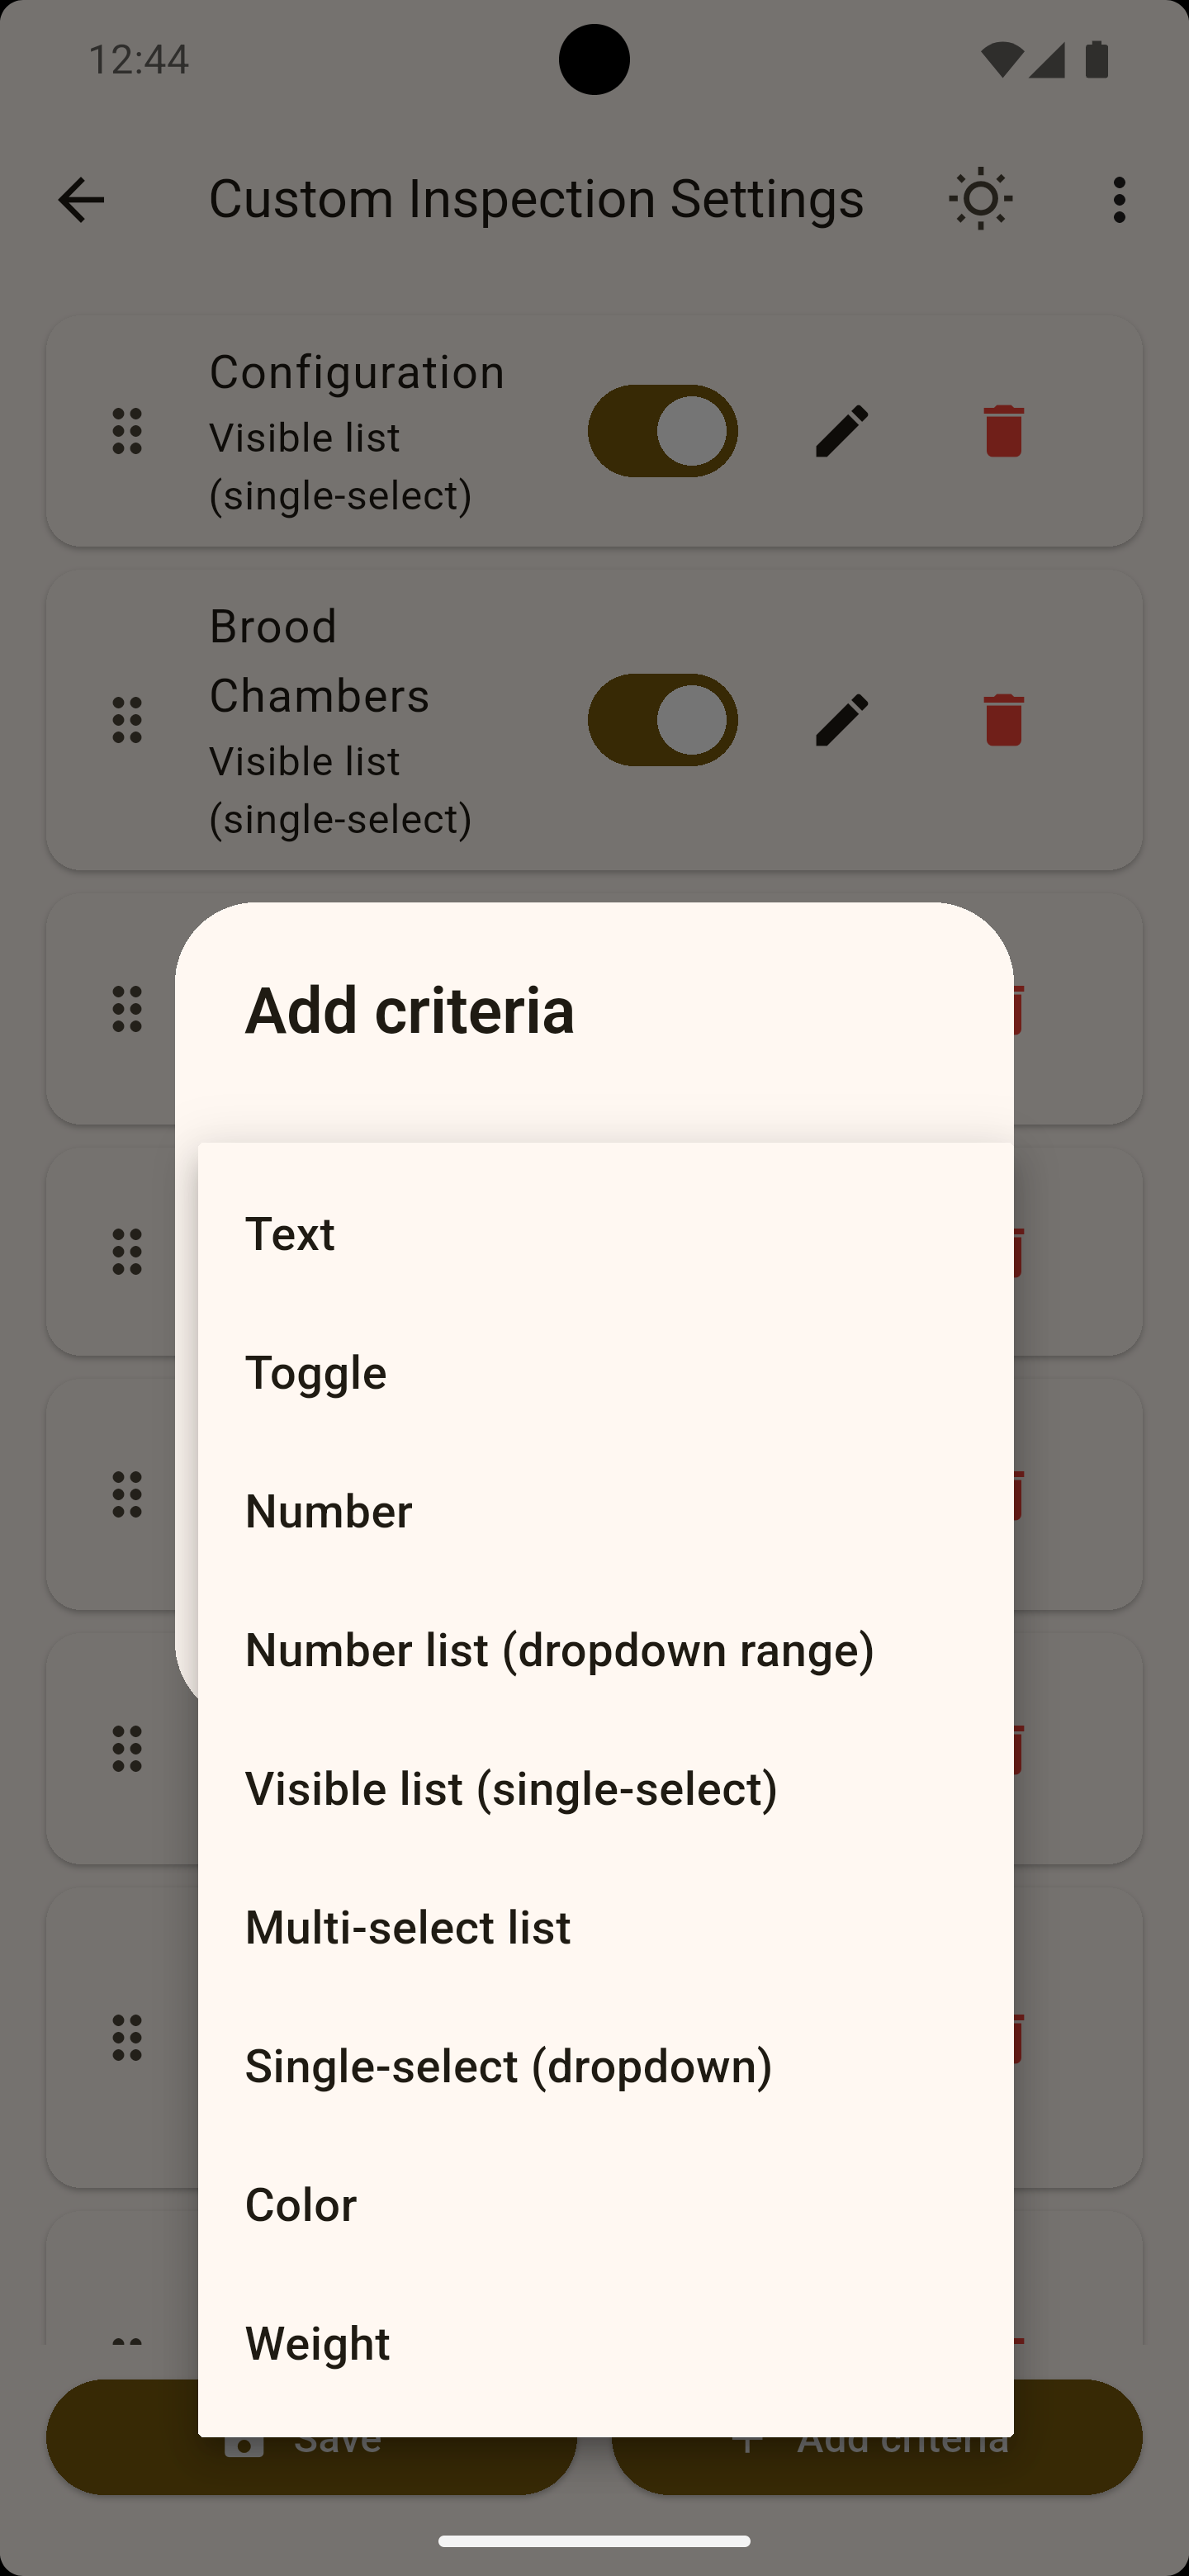
Inspection Settings Screen
The Inspection Settings Screen is what truly sets Apioly apart from other beekeeping apps. This is where you take full control of how your inspections look and function.
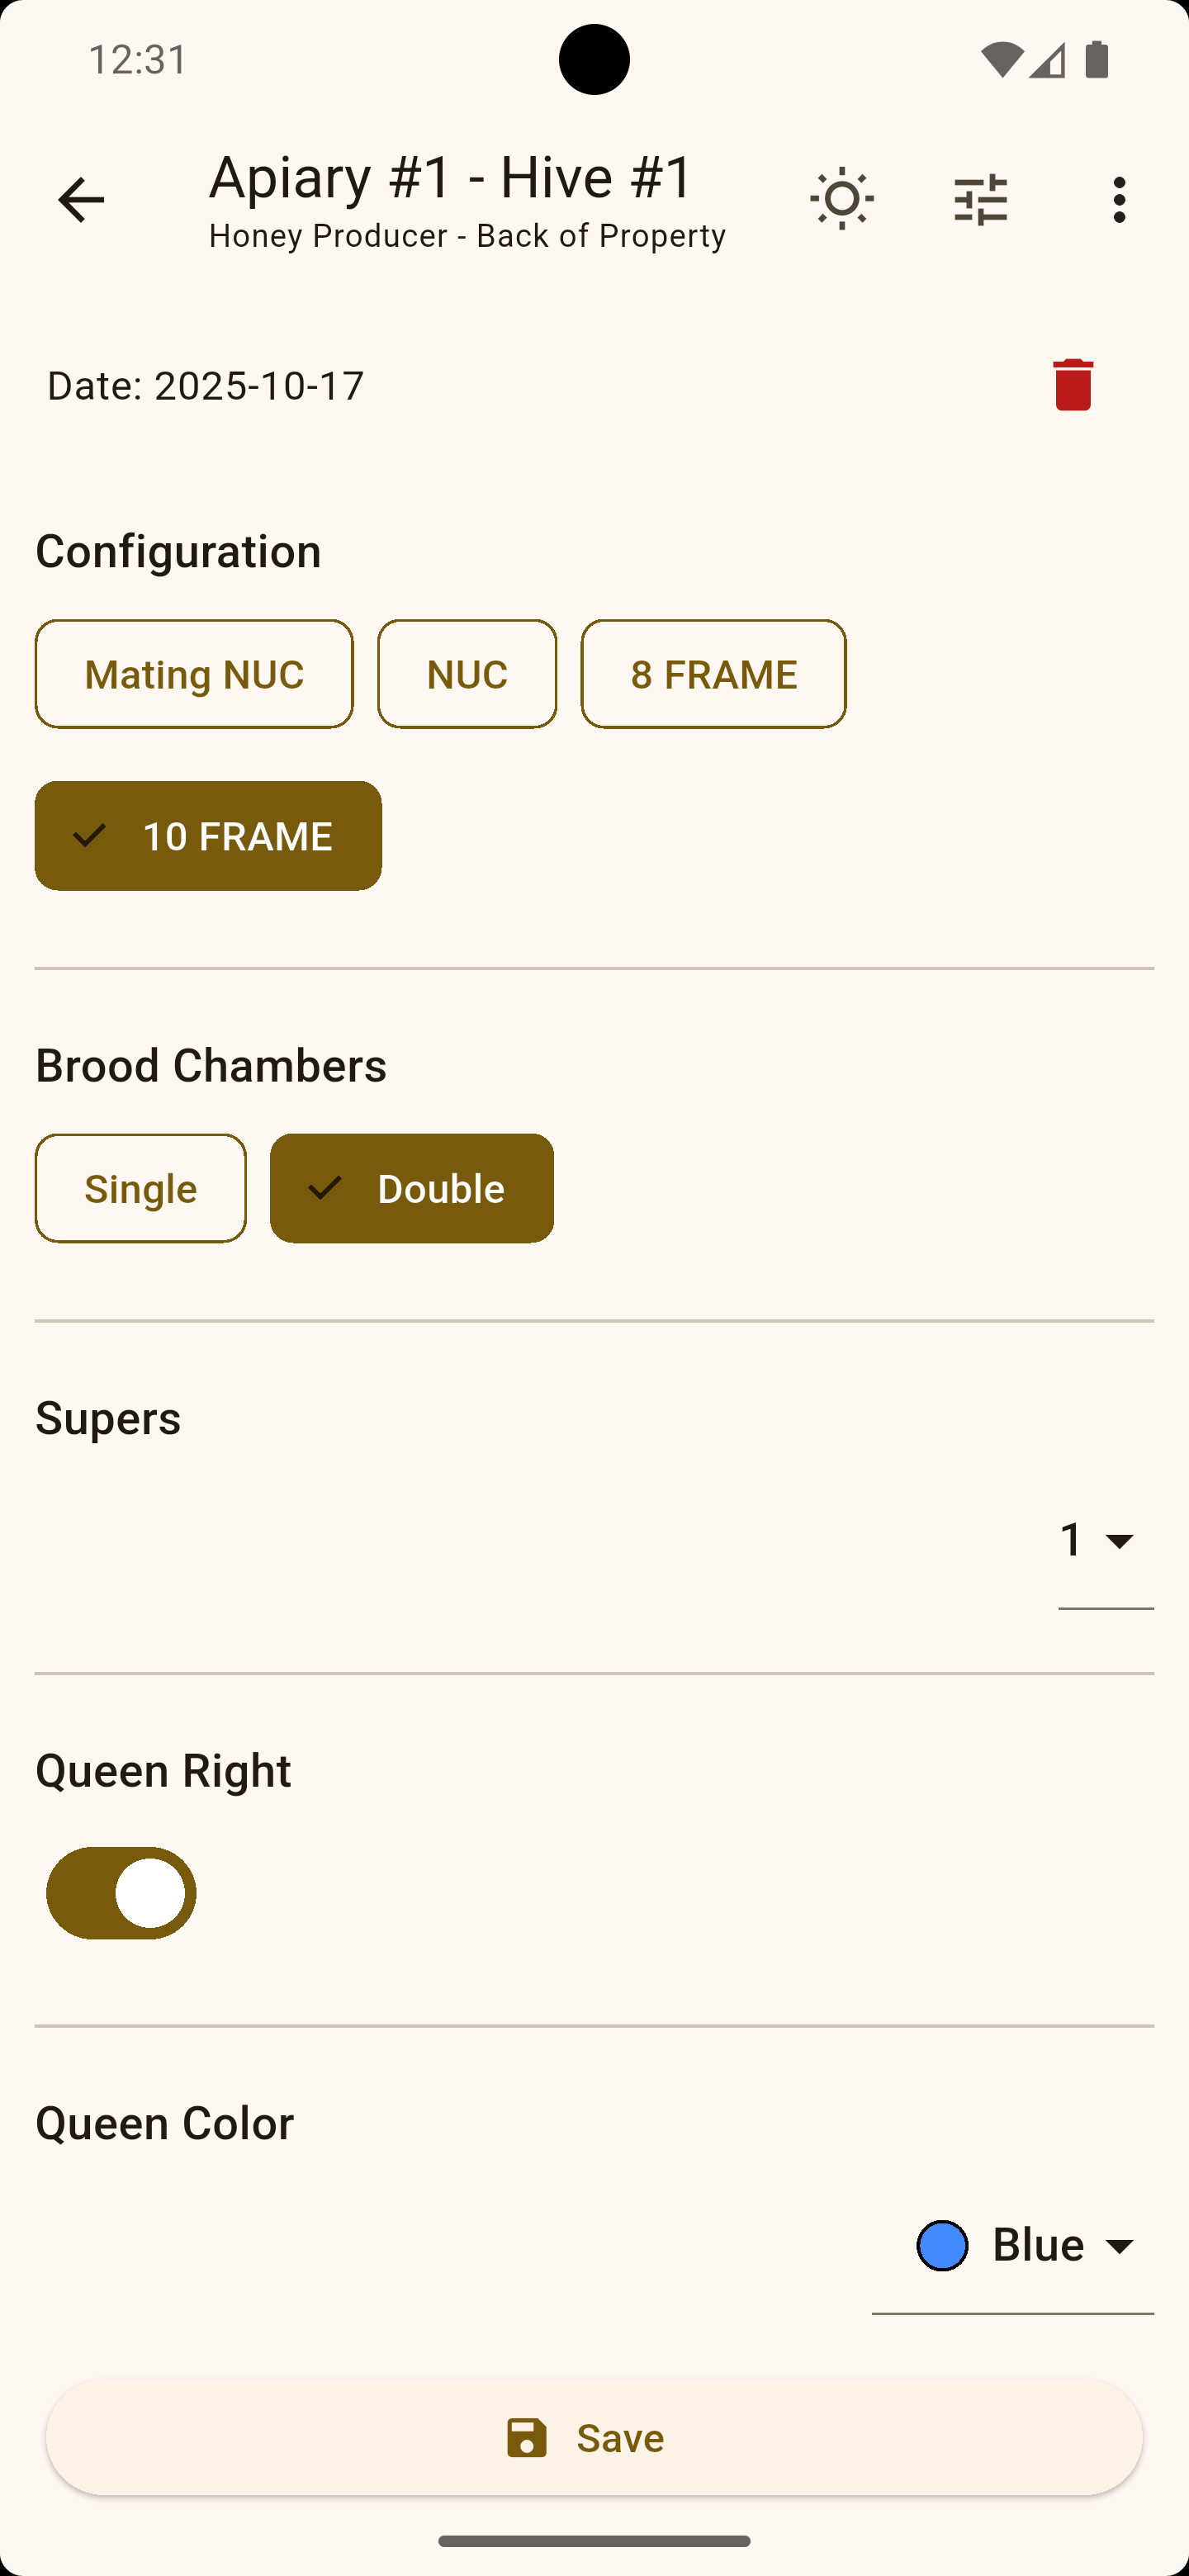
In the background of the image to the left, you’ll notice toggle buttons next to each inspection criterion. If there’s a field you don’t use, simply turn its toggle off and it will no longer appear on your Hive Inspection Screens. You can turn it back on anytime.
You’ll also see a set of six dots on the left side of each criterion row. Press and hold those dots for about two seconds, then drag the row to rearrange its order. This lets you organize your inspection screen in the way that makes the most sense for your workflow.
Each criterion row also includes an Edit icon, which allows you to change the name, type, and values of that criterion. For example, if you prefer “Hive Type” instead of “Configuration,” simply edit the label. You can also change how the field behaves—switch a visible list to a dropdown, modify options, or even repurpose an existing field entirely.
Free users can add up to three custom criteria, but can fully modify any of the existing ones (except for speech-to-text, audio recording, and photos). To make the most of your free plan, avoid deleting built-in fields you may want to repurpose later. Hide unused ones instead.
If you activate the Free 30-Day Pro Trial, you can add unlimited custom criteria during that time, and those custom fields will remain available even if you return to the Free plan afterward.
Apioly Pro users have full flexibility to create as many custom inspection criteria as they like. Tap the “Add Criteria” button at the bottom of the screen to open a list of available types. Each serves a specific purpose:
Text – A free-entry text box for notes or descriptions.
Toggle – A simple Yes/No switch.
Number – A numeric input field.
Number List (Dropdown Range) – Lets you define a minimum and maximum, creating a dropdown list of selectable numbers without typing each one manually.
Visible List (Single Select) – Displays all options visibly on screen; you can choose one value.
Multi-Select List – Similar to a visible list, but allows choosing multiple values.
Single-Select (Dropdown) – Displays options in a dropdown menu, saving space but requiring an extra tap to open.
Color – Recreates the “Queen Color” criterion; useful if that field was deleted and you want to restore it.
Weight – Allows numerical entry that automatically adjusts between pounds and kilograms based on your app’s selected units.
The Inspection Settings Screen gives you the flexibility to shape Apioly into your own beekeeping workflow—whether you’re tracking brood frames, honey stores, mite loads, or anything unique to your operation.

.png?h=54768f41b661b089e1f71974a68907f2)